
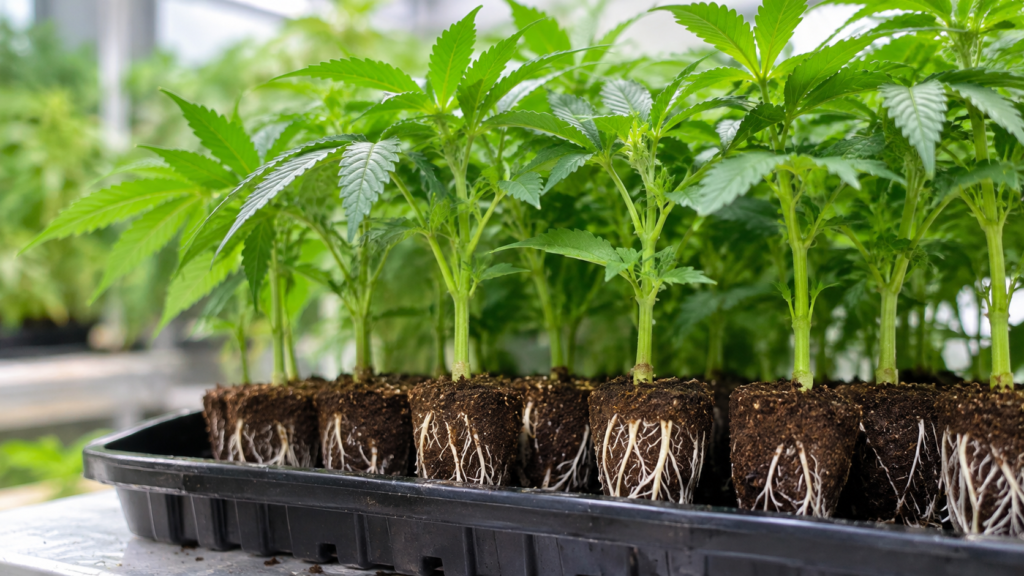
Most cannabis crop losses tied to clones don’t happen because the genetics were bad. They happen in the first week during the gap between when a clone arrives and when it’s fully integrated into a grow space. That’s the window where transplant shock sets in, where pests and pathogens either get caught or get missed, and where a single overlooked clone can end up costing an entire room.
This guide walks through what actually happens to a clone during that window, what to look for, and what the available evidence says about preventing the most common losses rooting failure, transplant shock, pest introduction, and Hop Latent Viroid (HLVd).
Why the First Week Matters More Than the Genetics
A clone is a cutting, not a seedling. It doesn’t have the vigor or disease resistance that seed-grown plants typically have, and it carries forward anything the mother plant was carrying good or bad. Cultivation researchers and industry associations have pointed out that clones are one of the most common ways pests and pathogens enter an otherwise clean grow room, precisely because a cutting can look completely healthy while hosting an infestation or infection that hasn’t shown symptoms yet.
That’s the core reason experienced growers treat the arrival period as a distinct, procedural stage not just “unboxing” rather than something to rush through on the way to full production.
Step 1: Inspect Before You Do Anything Else
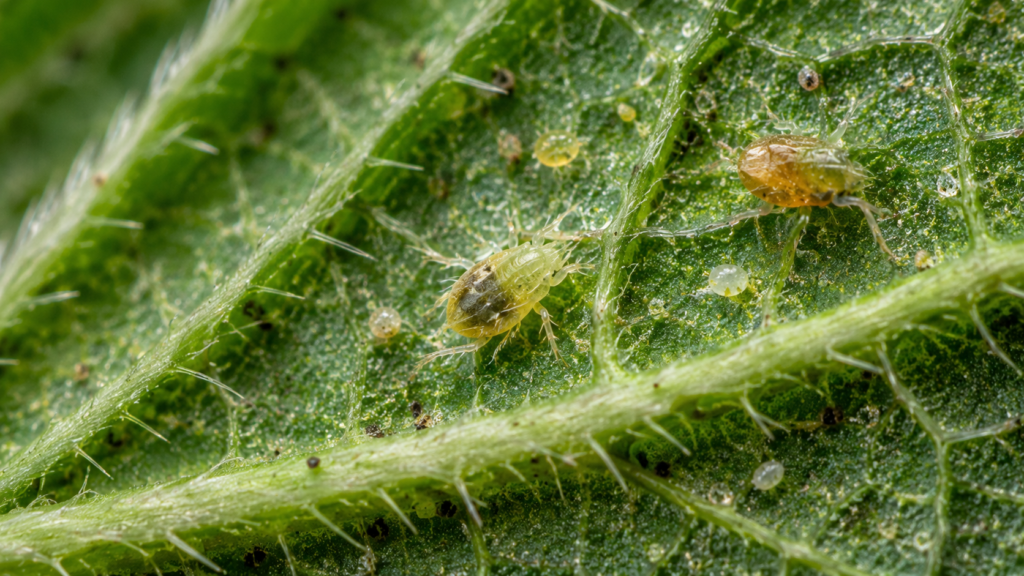
Before a new clone touches your growing medium, root zone inspection and a close visual check should happen first. According to cultivation guidance from industry groups such as the Cannabis Horticultural Association, there are two areas worth examining every time: the stems/leaves, and the roots.
On the foliage, look for:
- Stem firmness — a stem should be firm and green; soft, collapsed, or black-spotted stems can indicate botrytis (gray mold) or crush damage from shipping
- Leaf color — some lower-leaf yellowing during shipping is common, but widespread yellowing, spotting, or necrotic edges is not
- Pest evidence on the undersides of leaves spider mite stippling, fine webbing, fungus gnat eggs near the medium, or the silvery streaking thrips leave behind
On the roots, look for:
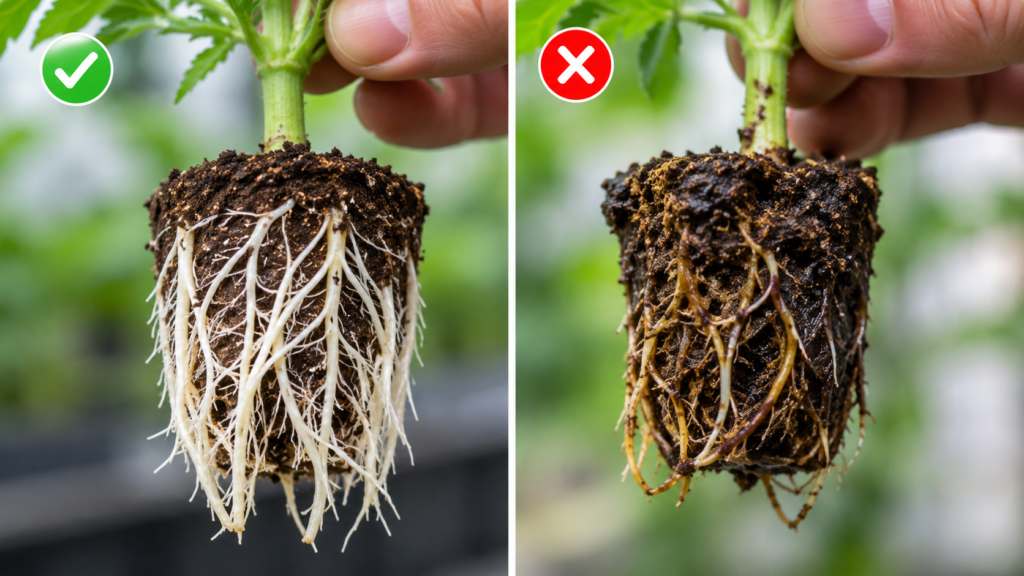
- White to cream-colored, firm roots this is the baseline for a healthy clone
- Brown, mushy, or foul-smelling roots, which point to rot rather than a clone that just needs time
A jeweler’s loupe or a cheap digital microscope (30x–100x) is standard equipment for this step. Several pests that matter most — russet mites, broad mites, early stage thrips are difficult or impossible to identify with the naked eye, and by the time an infestation is visible without magnification, it’s often already established.
Step 2: Quarantine Every Time, Regardless of Source
Quarantine is the single most consistently recommended practice across cultivation resources for one simple reason: pests and pathogens don’t always show symptoms on day one. Recommendations on quarantine length vary somewhat by source, generally ranging from about 7 to 14 days, with some commercial operations holding new genetics for a full month before they’re allowed near production areas. The Cannabis Horticultural Association also emphasizes keeping new clones physically separate not just in a different tray, but ideally in a different room or off-site — since staff moving between a quarantine area and the main grow can transfer pests on clothing or tools even when the plants themselves are kept apart.
During quarantine, the practical steps are:
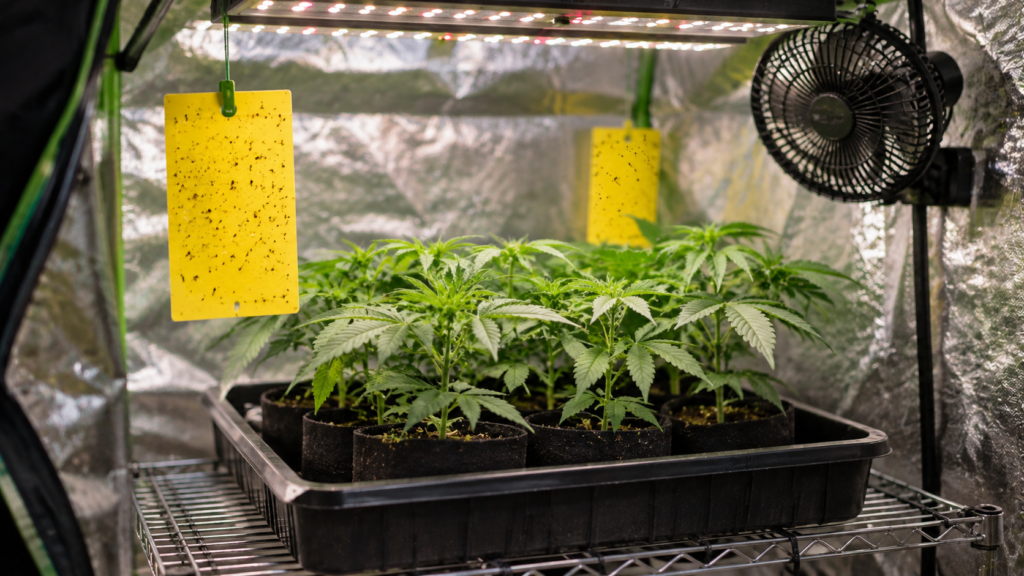
- Hold clones in a physically separate space, away from other plants and used tools
- Re-inspect daily under magnification, since pest eggs need time to hatch and latent symptoms need time to appear
- Use sticky traps to monitor for anything you might have missed on visual inspection
- Sanitize tools and hands, or change clothing, when moving between the quarantine area and the rest of the operation
If something turns up during quarantine, the plant can be treated or culled without ever having put the rest of the garden at risk. That’s the entire point of the step, and it’s the reason it shouldn’t be skipped even when clones come from a source you trust.
Step 3: Understand Hop Latent Viroid (HLVd) Even If Nothing Looks Wrong
HLVd deserves its own section because it breaks the normal rule of “inspect and you’ll catch it.” It’s a viroid an infectious RNA pathogen, first identified in cannabis in 2019 and it’s frequently asymptomatic. A plant can be carrying it and look completely normal.
According to research summarized by cannabis pathogen testing labs and peer-reviewed sources, what’s known about HLVd includes:
- It’s commonly called “dudding disease” because of the stunted growth, reduced vigor, and lower cannabinoid and terpene output it can eventually cause
- Clones taken from an infected mother plant tend to show reduced root development and slower rooting, which can look like an ordinary propagation problem rather than a pathogen issue
- Symptoms, when they do appear, tend to become more apparent later during flowering rather than propagation which means a mother plant or clone can pass through your entire quarantine period looking fine and still be infected
- It spreads through cuttings, contaminated tools, and in hydroponic systems, through shared water meaning it doesn’t require direct root-to-root contact to move between plants
- Symptoms alone can’t rule it out; industry testing labs and published research are consistent that confirming HLVd status requires molecular testing (such as qPCR), not visual inspection
For a home grower, this may simply mean sourcing from providers who can speak to their sanitation and testing practices, and watching for unexplained vigor or yield problems that don’t have another clear cause. For commercial operations, the more common approach described in industry sources is periodic qPCR testing of mother plants specifically, since a single infected mother can pass the viroid into every clone taken from it. This is a genuinely fast-moving area of cannabis pathology, and testing recommendations continue to evolve — treat specific protocols as something to verify with a current testing lab rather than something that’s settled permanently.
Step 4: Acclimate Before You Transplant
Once a clone has cleared inspection, the next mistake growers make repeatedly, across forums and grow logs is doing too much, too fast. Clones that were rooted or shipped in high humidity are used to a stable, forgiving environment. Moving them straight into full light intensity, a feeding schedule, or low ambient humidity is a common cause of the wilting and “crispy leaf” symptoms reported so often in grower communities.
The more consistent guidance across cultivation resources is:
- Bring humidity down gradually over roughly 48–72 hours rather than removing a humidity dome all at once
- Start under lower light intensity and increase it gradually rather than placing clones under full-strength lighting immediately
- Hold off on feeding for the first 24–48 hours the root system usually isn’t ready to process nutrients yet, and heavy feeding into an already-stressed plant tends to make things worse, not better
- Water lightly rather than heavily; overwatering a stressed root system is one of the most frequently cited causes of stem and root rot in clones during this period
Step 5: Transplant at the Right Time, the Right Way
Transplant shock sudden wilting tied to a disruption in the root system is one of the most commonly reported clone problems in grower forums, and most of it traces back to timing or handling rather than anything wrong with the clone itself.
Signs a clone is actually ready to transplant:
- Roots have developed enough to hold the growing medium together
- Roots haven’t yet started circling or spiraling inside the current container a sign it’s already past the ideal window
Practices that reduce transplant shock:
- Water lightly to settle the new medium rather than heavily “sealing it in”
- Avoid increasing light intensity or starting a feeding regimen on transplant day give the plant 24–48 hours to settle first
- Transplant on a low-light or overcast day/time if working with any natural light, since intense light immediately after root disturbance compounds stress
- Handle by the root plug or container, never by the stem, to avoid physically damaging tissue that’s already under stress
Some minor drooping in the first day is common and typically resolves on its own. Wilting that continues beyond 48–72 hours, or that comes with yellowing or a soft stem, usually points to something other than ordinary transplant adjustment root damage, overwatering, or a pest/pathogen issue worth re-inspecting for.
Clones vs. Seeds: A Quick Note for Commercial Planning
This is a common question for anyone scaling production, and it’s worth being direct about the trade-off rather than treating one as universally better:
- Clones are genetically identical to the mother, which means uniform growth patterns, predictable timelines, and consistent output — but they also carry forward any pathogen or pest issue the mother plant has, and they generally start with less vigor than a seed-grown plant.
- Seeds tend to produce more vigorous plants with fewer inherited disease issues, but they introduce genetic variation (unless working from stabilized, feminized stock) and require more time and space to evaluate before they’re production-ready.
Most commercial operations use a combination: seed-grown plants to establish and periodically refresh a clean mother stock, and clones for day-to-day production uniformity which is exactly why mother-plant testing and clone quarantine matter as much as they do.
Frequently Asked Questions
Why won’t my clone root? The most commonly cited causes across grower forums are overly wet rooting media (which leads to stem rot before roots ever form), temperatures that are too cool, insufficient humidity around the cutting, and cuttings taken from mother plants that were already in flower flowering hormones work against root development. An angled cut that includes a node, made with a clean, sharp blade, is consistently cited as improving success rates.
How long does rooting normally take? This varies by strain, method, and environment, but most grower-reported timelines fall somewhere between one and three weeks. Cuttings taking noticeably longer than that are worth inspecting for stem rot or checking environmental conditions (temperature and humidity) rather than simply waiting longer.
How long should I quarantine new clones? Most cultivation sources recommend 7 to 14 days at minimum, with some commercial operations extending this to a full month for new genetics. Longer is generally more protective, since some pests and pathogens take time to become visible.
Can a clone look completely healthy and still be a problem? Yes. This is the central issue with Hop Latent Viroid it’s frequently asymptomatic, especially during propagation and early vegetative growth, and confirming its presence requires molecular testing rather than visual inspection.
What’s the biggest mistake growers make with new clones? Based on recurring patterns in grower discussions, it’s doing too much too soon after arrival or transplant full light, heavy feeding, and heavy watering rather than allowing a gradual acclimation period.
Is some wilting after transplant normal? Mild, short-term drooping is common and usually resolves within a day or two as the plant adjusts. Wilting that persists past 48–72 hours, or that’s accompanied by yellowing or stem softness, usually indicates a separate issue worth investigating.